551 434/7/3
Description Rubh An Dunain
Collection Dr Colin and Dr Paula Martin
Catalogue Number 551 434/7/3
Category All Other
Permalink http://canmore.org.uk/collection/1407344
Collection Hierarchy - Sub-Group Level
Collection Level (551 434) Dr Colin and Dr Paula Martin
> Group Level (551 434/7) Maritime Landscape
>> Sub-Group Level (551 434/7/3) Rubh An Dunain
| Preview | Category | Catalogue Number | Title | Date | Level |
|---|---|---|---|---|---|
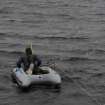 |
On-line Digital Images | DP 175366 | Attempts have been made to search the shallow loch bed, since it is likely that further early boat components will be found there. The simplest method has been to use a small inflatable raft pulled along rope lanes stretched across the loch by a snorkeller. (Colin Martin) | 2008 | Item Level |
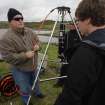 |
On-line Digital Images | DP 175368 | Trials have been made using sector scanning to search the loch bed for archaeological features. Here Dr Brian Abbott prepares the equipment for a test run. (Colin Martin) | 2008 | Item Level |
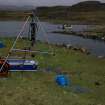 |
On-line Digital Images | DP 175369 | Trials have been made using sector scanning to search the loch bed for archaeological features. The equipment is seen here assembled and ready for launching. (Colin Martin) | 2008 | Item Level |
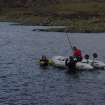 |
On-line Digital Images | DP 175370 | Trials have been made using sector scanning to search the loch bed for archaeological features. The equipment is seen here being positioned. Results so far have been encouraging, but a more sustained programme is required. (Colin Martin) | 2008 | Item Level |
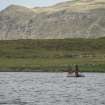 |
On-line Digital Images | DP 175372 | More work on studying the historic environment of Rubh’ an Dùnain is required. Here Dr Richard Tipping of the University of Stirling obtains some test cores from the loch bed. (Edward Martin) | 2008 | Item Level |
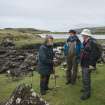 |
On-line Digital Images | DP 175373 | Dr Colin Martin (left), the Project Director, confers on site with Dr David Macfadyen (right), who found the 12th century boat timber in 2000.With them is Gavin Parsons of Sabhal Mor Ostaig, the Gaelic College on Skye, who is advising on place-name studies and other local cultural issues. (Edward Martin) | 2008 | Item Level |
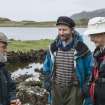 |
On-line Digital Images | DP 175374 | Dr Colin Martin (left), the Project Director, confers on site with Dr David Macfadyen (right), who found the 12th century boat timber in 2000.With them is Gavin Parsons of Sabhal Mor Ostaig, the Gaelic College on Skye, who is advising on place-name studies and other local cultural issues. (Edward Martin) | 2008 | Item Level |
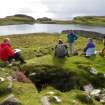 |
On-line Digital Images | DP 175375 | This site has elicited much interest and discussion from heritage agencies and others. Here, seated on the remains of a Neolithic chambered cairn overlooking Loch na h-Airde in September 2013, an informal international seminar is taking place. From left, Philip Robertson (Historic Scotland), George Geddes (Royal Commission on the Ancient and Historic Monuments of Scotland), Edward Martin (archaeological photographer), and Dr Ian MacLeod (Western Australian Museum). Behind the camera is Dr Colin Martin (University of St Andrews). (Colin Martin) | 2008 | Item Level |
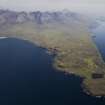 |
On-line Digital Images | DP 175294 | Aerial photograph of the Rubh’ an Dùnain peninsula from the W, with the Cuillin Hills rising in the background. Loch na h-Airde is close to the tip of the peninsula. Loch Brittle is on the left, with Glenbrittle at its head. (Edward Martin) | 2008 | Item Level |
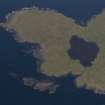 |
On-line Digital Images | DP 175295 | Aerial photograph of the W tip of the Rubh an Dùnain peninsula showing Loch na h-Airde and the canal linking it to the sea. The islet of Sgeir Mhòr provides a sheltered anchorage beyond the canal's mouth. (Colin Martin) | 2008 | Item Level |
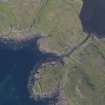 |
On-line Digital Images | DP 175296 | Aerial photograph of the headland fort and canal from the SE. Underwater indications of a stone-built quay can be seen on either side of the canal’s entry to the loch. Beyond the canal entrance a basin of deeper water largely clear of weed is visible. (Colin Martin) | 2008 | Item Level |
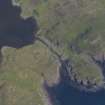 |
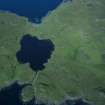
On-line Digital Images | DP 175297 | Aerial photograph of the headland fort and canal from the SW. Underwater indications of a stone-built quay can be seen on either side of the canal’s entry to the loch. Beyond the canal entrance a basin of deeper water largely clear of weed is visible. (Colin Martin) | 2008 | Item Level |
 |
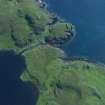
On-line Digital Images | DP 175298 | Aerial photograph of the headland fort, canal, and loch from the S. (Colin Martin) | 2008 | Item Level |
 |
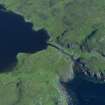
On-line Digital Images | DP 175300 | Aerial photograph of the canal and headland fort from the NW. The cleared channel towards the mouth of the canal is evident. (Colin Martin) | 2008 | Item Level |
 |
On-line Digital Images | DP 175301 | Aerial photograph of the canal and headland fort from the SW. The cleared channel towards the mouth of the canal is evident. (Colin Martin) | 2008 | Item Level |
 |
On-line Digital Images | DP 175302 | Loch na h-Airde from the settlement above Rubh’ an Dùnain, looking SW. | 2008 | Item Level |
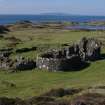 |
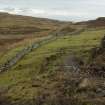
On-line Digital Images | DP 175303 | Loch na h-Airde from the settlement above Rubh’ an Dùnain, looking SW. The so-called ‘Tacksman’s House’ is in the foreground. (Colin Martin) | 2008 | Item Level |
 |
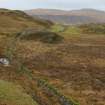
On-line Digital Images | DP 175304 | The Slochd Dubh – Black Dyke – a stone wall running from one side of the Rubh’ an Dùnain peninsula to the other, evidently defining a territorial boundary. Though the present wall is relatively modern its line shows modifications and traces of earlier structures, and the line may be of some antiquity. (Colin Martin) | 2008 | Item Level |
 |
On-line Digital Images | DP 175305 | The Slochd Dubh – Black Dyke – a stone wall running from one side of the Rubh’ an Dùnain peninsula to the other, evidently defining a territorial boundary. Though the present wall is relatively modern its line shows modifications and traces of earlier structures, and the line may be of some antiquity. (Colin Martin) | 2008 | Item Level |
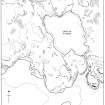 |
On-line Digital Images | DP 175307 | Map showing features connected with the canal and its surroundings at Rubh’ an Dùnain. (Colin Martin) | 2008 | Item Level |
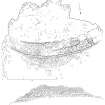 |
On-line Digital Images | DP 175308 | Plan and N elevation of the headland fort at Rubh’ an Dùnain. (Colin Martin) | 2008 | Item Level |
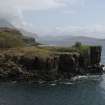 |
On-line Digital Images | DP 175309 | Headland fort from the W. Note the likelihood that much of its seaward interior has been lost to rock fall. (Colin Martin) | 2008 | Item Level |
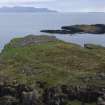 |
On-line Digital Images | DP 175312 | Headland fort from the NE, looking towards Rum. (Colin Martin) | 2008 | Item Level |
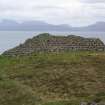 |
On-line Digital Images | DP 175313 | Headland fort, N face of wall, looking S towards Rum. (Colin Martin) | 2008 | Item Level |


