
Kirkcudbright Training Area


Military Training Site (20th Century)
Site Name Kirkcudbright Training Area
Classification Military Training Site (20th Century)
Canmore ID 240905
Site Number NX74NW 153
NGR NX 74226 46732
Datum OSGB36 - NGR
Permalink http://canmore.org.uk/site/240905


First 100 images shown. See the Collections panel (below) for a link to all digital images.
- Council Dumfries And Galloway
- Parish Rerrick
- Former Region Dumfries And Galloway
- Former District Stewartry
- Former County Kirkcudbrightshire
NX74NW 153 74226 45732
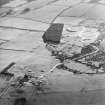
This description of the Kirkcudbright Training Area (KTA) is based on an archaeological survey by RCAHMS during 2002, examination of aerial photography taken in 1946, 1962, 1975 and 1988, and on discussions with staff at Range Control Castle Hill. A generalised description of the chronology of activity on the range is followed by a description its constituent parts. It is expected that this description will be enhanced by further research on the military history of the KTA.
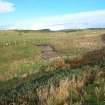
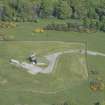
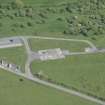
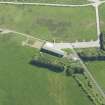
The KTA was acquired by the War Office in 1942 and extends across an area of about 19 square km, comprising the greater part of a promontory to the S of Kirkcudbright and WSW of Dundrennan village. Most of the ground is S facing, relatively low undulating ground, extending from a high point on Brown Hill at 150m ASL, down to a terrace at about 20m ASL, bounded by low sea cliffs on the S. The Solway effectively forms the 'backstop' to the range, though the two local eminences of Big Raeberry and Wall Hill have also been used in this way. The functional parts of the range can be divided between firing positions dispersed across the N and connected by a tank road, with targets scattered across the 'impact zone' in the central and southern parts of the range. Bunkers, to provide shelter for personnel and equipment, are distributed within the impact zone. Headquarters, range control and accommodation have occupied various locations, generally at the fringes of the KTA. The main focus of activity on the KTA, until the recent change to Infantry Training, has been Tank Training.
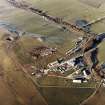
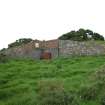
Vertical aerial photographs taken by the RAF on 4 May 1946 (106G/Scot/UK43) illustrate the early development of the range. By this date many of the structural elements of the range, such as tank roads and bunkers had been completed, though disturbed ground around some structures and the lines of communication trenches visible on the photographs show that some work was undertaken in 1946. Headquarters and some accommodation was focused on Netherlaw House and there was a large group of huts and tank sheds on the N flank of Howwell Hill. Girstingwood is established by 1946 as little more that a group of huts and shed at the E end of the tank road.
The use of the range at this date appears to have been divided between mechanised vehicle training in the eastern half of the KTA and an emphasis on firing from fixed points in the west.
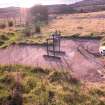
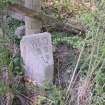
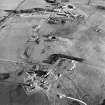
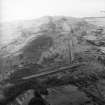
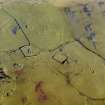
In the east the aerial photographs show extensive patterns of tracks where tracked vehicles have churned the ground surface. Within this area many of the watercourses are bridged by concrete tank crossing points, generally in groups of three. Also within this area there are rows of narrow concrete posts, usually arranged in lines of up to 8 posts that may range in height from 0.5m to about 2m. These have may been some form of target or a range finding mechanism.
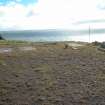
In the western half of the range use focused on a series of fixed firing stances ranged along the northern fringe of the range. These are serviced by the tank road with also connected to three trapezoidal tank tracks that could be used to practice firing from a mobile vehicle. The targets are disposed on the terrace above the sea cliffs and comprise four tracked targets running on a narrow gauge rail and powered by plant in bunkers are either end of the track. The scoring of the ground behind these targets by shell impacts can be seen on the aerial photographs, though none of it appears to be fresh in 1946. Smaller targets, presumably for small calibre weapons, comprise three pairs of bunkers housing pop-up iron frames across which canvas or other material may have been stretched.
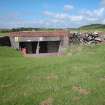
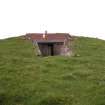
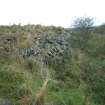
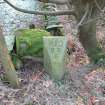
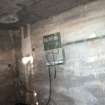
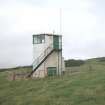
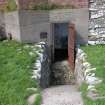
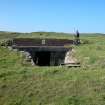
The bunkers that are disposed across the impact zone can be divided into those associated with the tracked targets which housed plant and mechanisms to drive the targets and observation bunkers furnished with small ports and heavy steel doors. Some of the bunkers associated with the targets may have served specialised functions such as operations control and ammunition storage.
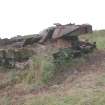
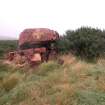
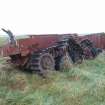
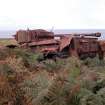
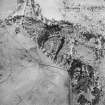
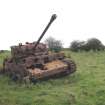
Further developments of the range in the 1960s and 1970s saw the installation of additional tracked targets including the massive track on the N flank of Wall Hill. By 1962 aerial photographs (RAF 58/4957, 22 February 1962) suggest that the use of the eastern half of the range for extensive mechanized vehicle manoeuvers may have ceased. From 1975 the hulks of tanks disposed across the southern and central part of the range, but predominately in the east, provided additional targets. Gantry targets in groups of up to three and in a variety of sizes are also constructed during the 1970s and later; indeed some remain in use.
During the 1980s the figure-of-eight tank track on High Barcheskie was built and additional firing ramps, including ones with a variety of angles of rest are installed around the Central Firing Point (NX 731 456). Testing and development facilities for the Milan Missile are built on Silver Hill and there was attack of armour testing and deflagration of 500lb bombs in the Gypsy Point area; mine plough testing was also conducted in this area. The testing Depleted Uranium shells saw further development work including the construction or development of the firing complexes on Doon Hill, at Balig and at Silver Hill Low.
Information from RCAHMS (DCC) 21 April 2003

